Based on the survey results of 398 pro players, this setting has been determined. Take your gameplay to the next level with these best Valorant settings.
Make a significant difference in your gaming experience, from enhancing visuals to boosting performance and overall gameplay.
Our comprehensive settings guide is the result of thorough testing, pro player input, and benchmark analysis. While some settings may be personal preference, others can provide a strategic advantage that shouldn’t be overlooked.
1. Disabling Show Spectator Count in Valorant
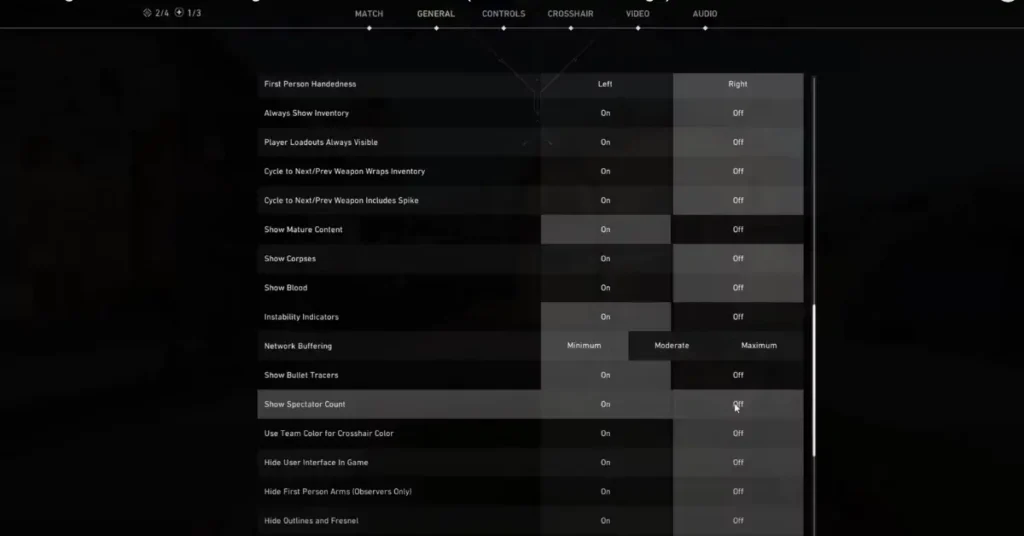
Eliminate potential distractions and reduce performance anxiety by turning off the option to display the spectator count. This ensures a clearer focus during intense gameplay moments, especially during clutch situations.
| Show Spectator Count | OFF |
2. Utilizing the Team Mute Key in Valorant
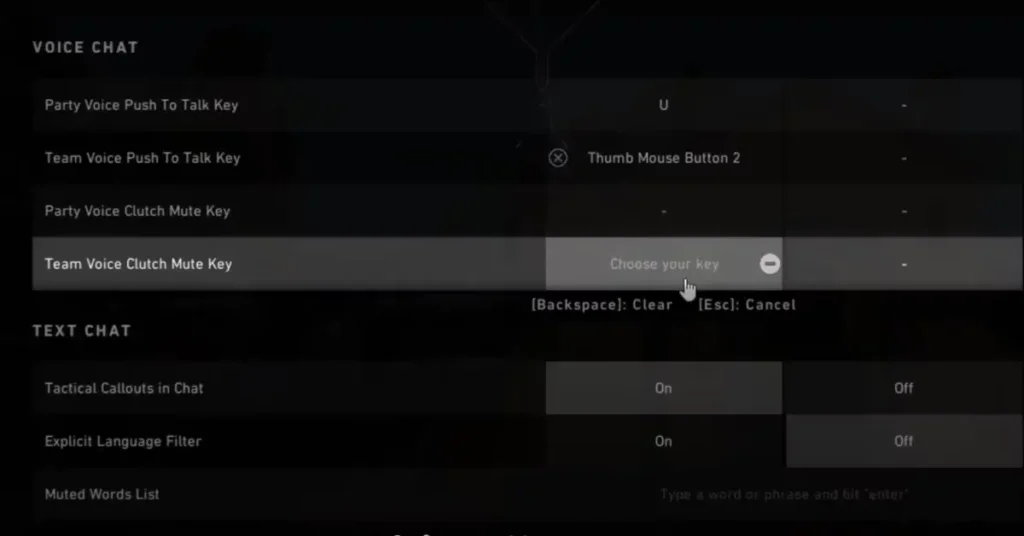
Stay fully immersed in the game by assigning a convenient key bind to mute your entire team. This feature comes in handy when teammates engage in unnecessary arguments or distractions, allowing you to maintain focus and concentration.
| Team Voice Clutch Mute Key | On |
3. Best Audio Settings for Valorant
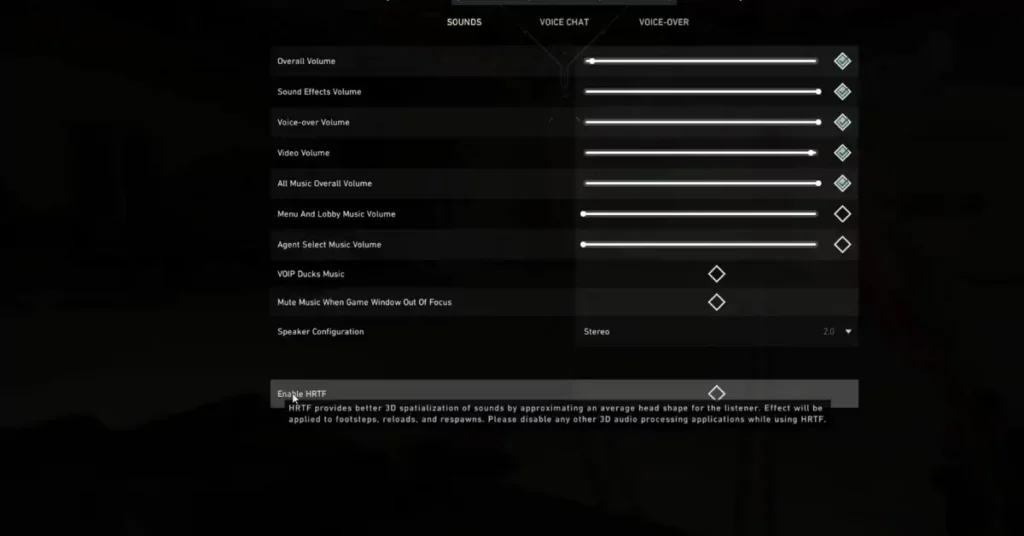
Enabling HRTF:
Optimize your audio experience by enabling HRTF (Head-Related Transfer Function), which enhances positional audio cues. This setting improves your ability to locate enemies based on their footsteps, reload sounds, and other environmental cues, providing a tactical advantage in gameplay.
| HRTF | Enable |
| Auto Equip Prioritizes | Strongest |
| Don’t Auto Equip Melee | Enable |

Auto Equip Weapon Prioritize: Set to Strongest
Don’t Auto Equip Melee: Prevents auto-switching to melee after using abilities.
4. Utilizing the Shooting Error Graph for Valorant
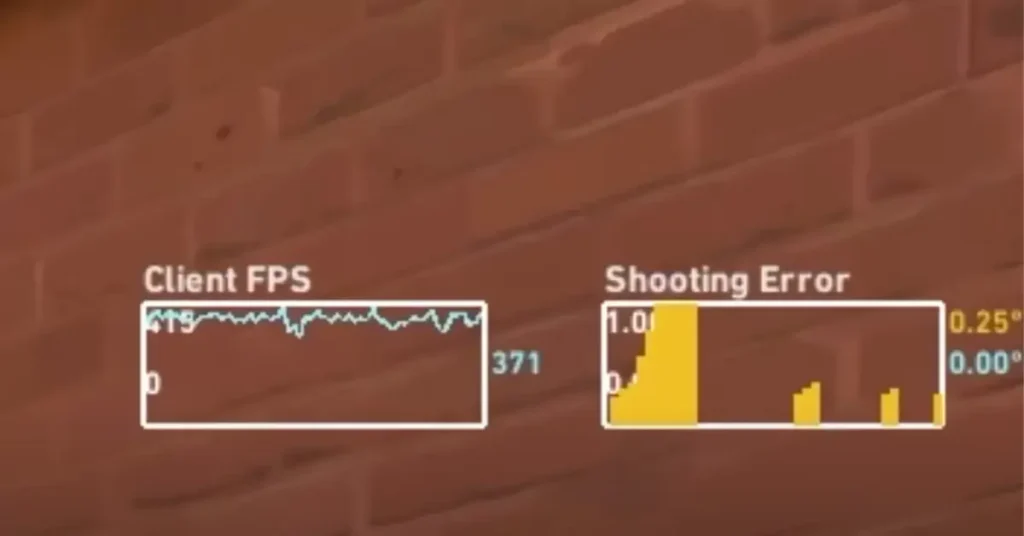
Gain valuable insights into your shooting accuracy and movement errors with the shooting error graph. This visual indicator helps you identify moments of inaccuracy caused by poor movement, enabling you to refine your gameplay mechanics for better performance.
| Shooting Error | Graph only |
How to Join Valorant PBE in 2024? (Sign Up)
5. Movement Error Settings in Valorant
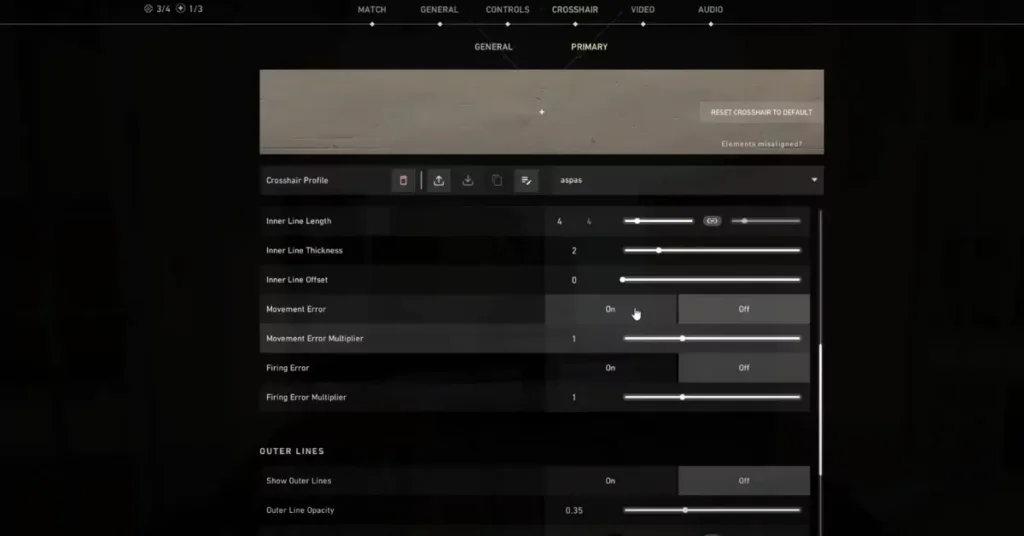
Fine-tune your crosshair settings to include movement error indicators, allowing you to recognize instances of reduced accuracy due to movement. By customizing these settings according to your preferences, you can improve your shooting efficiency and overall gameplay effectiveness.
| Movement Error | ON |
6. Best Minimap Settings for VALORANT
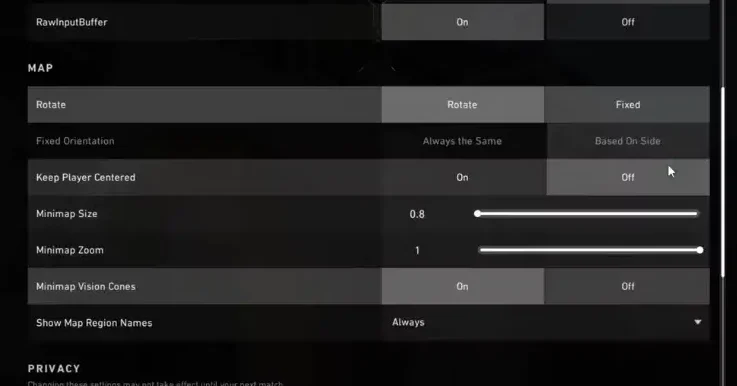
Personalize your mini-map settings to optimize map awareness and strategic decision-making. Adjust settings such as mini-map size, zoom level, and vision cones to suit your playstyle and enhance your understanding of in-game situations.
| Rotate | Fixed |
| Fixed Orientation | Based on side |
| Keep Player Centered | OFF |
| Minimap Size | 0.8 |
| Minimap Zoom | 1 |
| Minimap Vision Cones | ON |
| Show Map Region Names | Always |
7. Best Crosshair Settings and Designs for VALORANT
Explore various crosshair designs to find one that aligns with your aiming preferences and enhances your shooting accuracy. Experiment with different styles, including dot, lines, and outlines, until you discover the optimal setup for your gameplay.
| Crosshair Name | Crosshair Code |
|---|---|
| SEN TenZ Crosshair | (0;s;1;P;c;5;h;0;m;1;0l;4;0o;2;0a;1;0f;0;1b;0;S;c;4;o;1) |
| Curry Crosshair | (0;s;1;P;u;FF5F0FFF;t;2;o;1;d;1;f;0;0b;0;1b;0;S;c;5;s;1.049;o;0.707) |
| Grim Crosshair | (0;s;1;P;u;000000FF;h;0;f;0;0l;4;0v;3;0g;1;0o;0;0a;1;0f;0;1b;0;S;c;0;s;0.76;o;1) |
| PRX Something Crosshair | (0;P;o;0.619;d;1;f;0;s;0;0b;0;1b;0) |
| LEV Aspas (G.O.A.T) Crosshair | (0;P;h;0;0l;4;0o;0;0a;1;0f;0;1b;0) |
These codes can be used to customize your crosshair in Valorant according to your preference.
Simply copy the desired code and paste it into the game’s settings to apply the crosshair.
Remember to adjust the settings as needed to achieve the desired appearance and functionality.
8. Fine-tuning In-game Sensitivity (eDPI)
Formula to Calculate your eDPI = IN-Game SENSITIVITY × DPI = eDPI
Average eDPI for Pro-players in all valorant is 280 eDPI. If you’re over flicking lower your sensitivity, if you’re under flicking increase your sensitivity.
Refine your sensitivity settings to achieve precise aiming and smooth cursor movement. Adjust your sensitivity based on personal comfort and aiming consistency, ensuring optimal performance during intense gunfights and precise aiming scenarios.
9. Optimizing Mouse Input Buffer in Valorant
Reduce input lag and improve mouse responsiveness by enabling the raw input buffer option. This setting ensures that mouse inputs are directly transmitted to the game, minimizing delays and enhancing overall control and precision.
| RawInputBuffer | ON |
10. Enabling Show Blood and Corpses in Valorant
Reduce input lag and improve mouse responsiveness by enabling the raw input buffer option. This setting ensures that mouse inputs are directly transmitted to the game, minimizing delays and enhancing overall control and precision.
| Show Blood | ON |
| Show Corpses | OFF |
Gain valuable feedback during engagements by enabling visual cues for hitting enemies and identifying player corpses. This feature provides essential information about the outcome of gunfights and helps you make informed tactical decisions in real-time.
11. Leveraging Viper-specific Settings
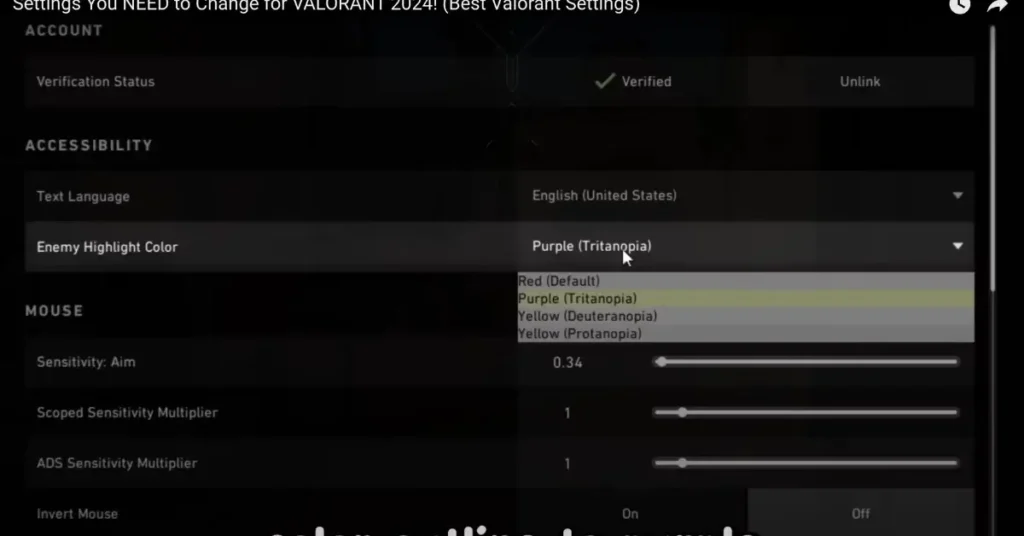
Maximize your effectiveness while playing as Viper by customizing specific settings tailored to her abilities. Adjust player color outlines and enable Bloom to enhance visibility within her ultimate ability, gaining a significant advantage over your opponents.
| Enemy Highlight Color | Purple (Tritanopia) |
| Bloom | ON |
12. Determining First-person Handedness
Identify your dominant eye and adjust first-person view models accordingly for improved reaction time and aim. This subtle adjustment can enhance your overall shooting mechanics and contribute to better performance in-game.
13. Best Valorant Graphics Settings for Valorant (Video settings)
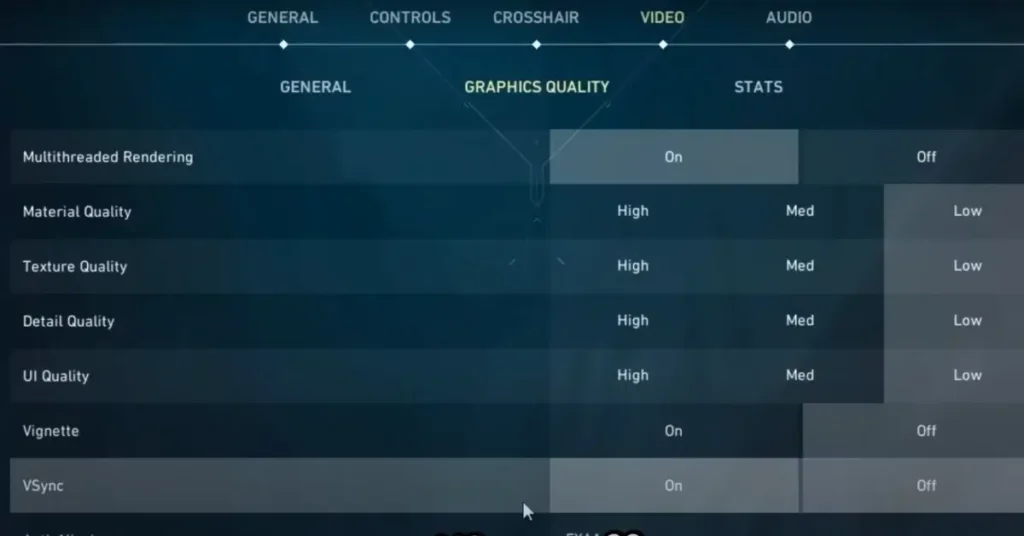
| Multithreaded Rendering | ON |
| Material Quality | LOW |
| Texture Quality | LOW |
| Detail Quality | LOW |
| UI Quality | LOW |
| Vignette | OFF |
| Vsync | OFF |
| Anti-Aliasing | None |
| Anisotropic Filtering | 1x |
| Improve Clarity | OFF |
| [BETA] Experimental Sharpening | OFF |
| Distortion | OFF |
| Cast Shadows | OFF |
| NVIDIA Reflex Low Latency | On + Boost |
Fine-tune your graphics settings to strike the perfect balance between visual quality and performance. Adjust settings such as material quality, texture detail, and anti-aliasing to optimize FPS (Frames Per Second) while maintaining visual clarity and immersion.
How to Import Valorant Settings to Aim Lab? – Easily
Graphics Settings On Desktop for Valorant
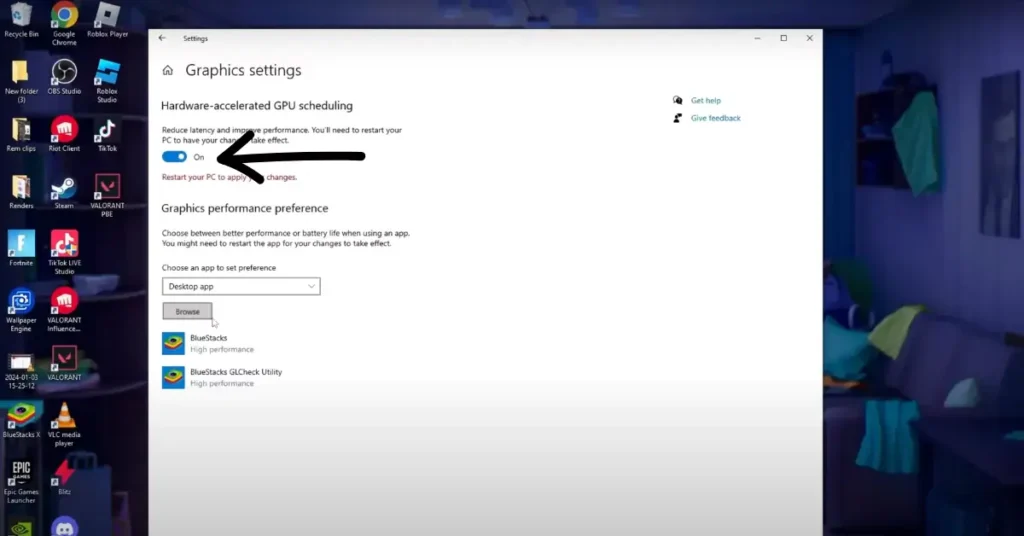
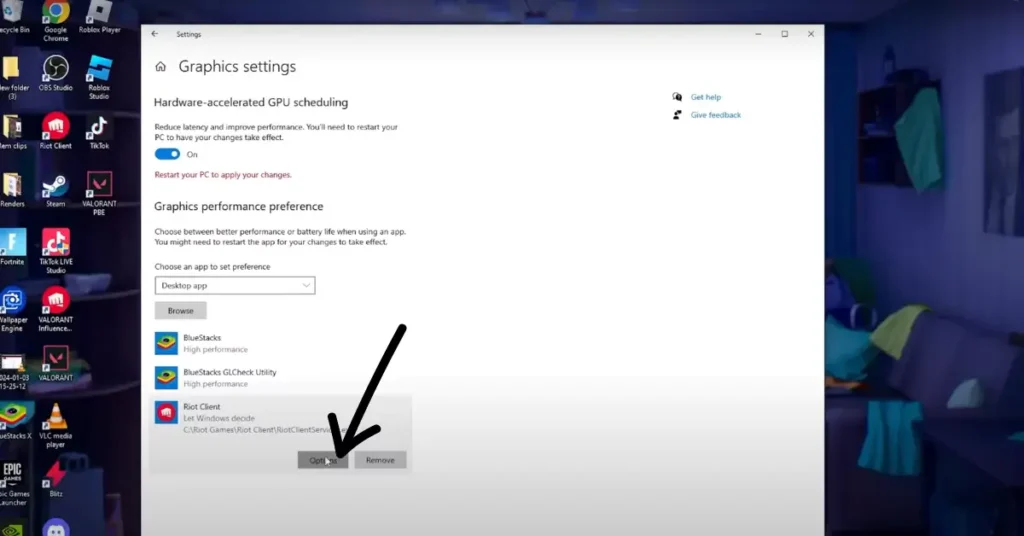
- Right-click on your desktop and select “Graphics Settings.”
- In the Graphics Settings window, locate the option for “Hardware-accelerated GPU scheduling” and toggle it to “On.”
- After enabling hardware accelerated GPU scheduling, click on the “Browse” button.
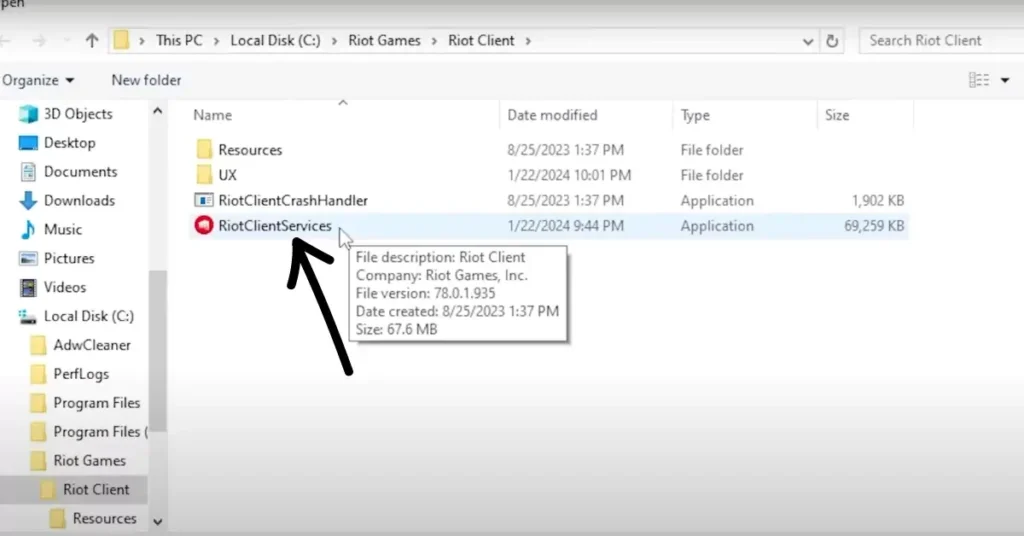
- Navigate to the Riot Games folder on your system.
- Inside the Riot Games folder, locate the Riot Client.
- Double-click on “RiotClientServices” to select it.
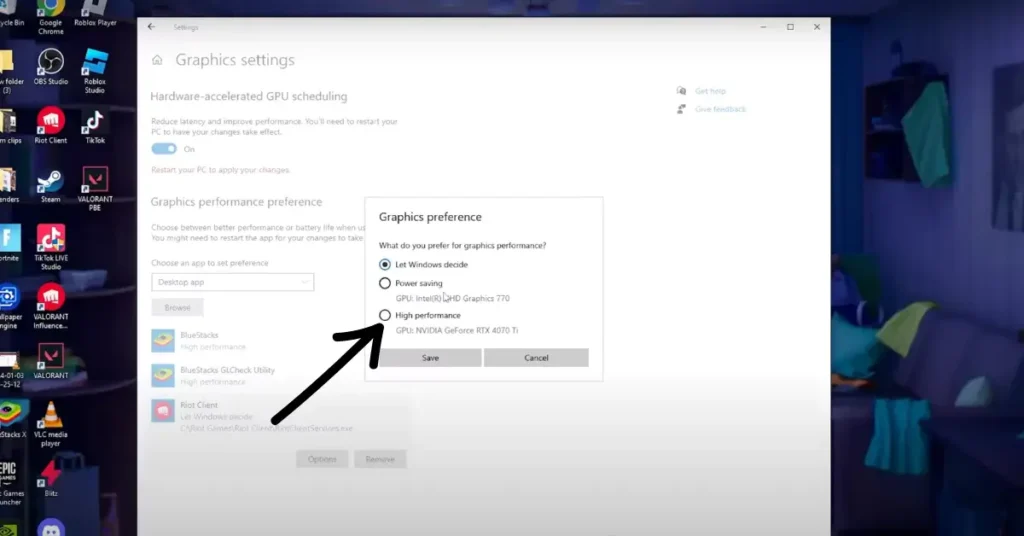
- Now, click on “Options.”
- In the Options menu, find the setting for “Graphics preference” and set it to “High performance.”
By meticulously optimizing these settings to suit your preferences and playstyle, you can elevate your performance in Valorant and dominate the battlefield with precision and finesse.